QUICK ANSWER
For the first Chapter 4 pedestal door, set the three symbols from left to right to the Y-like mark, the C-like mark and the upward arrowhead. Reveal the floor lines with the sphere if the stylized shapes are hard to identify.
Three pedestal answer: Y, C, upward arrow
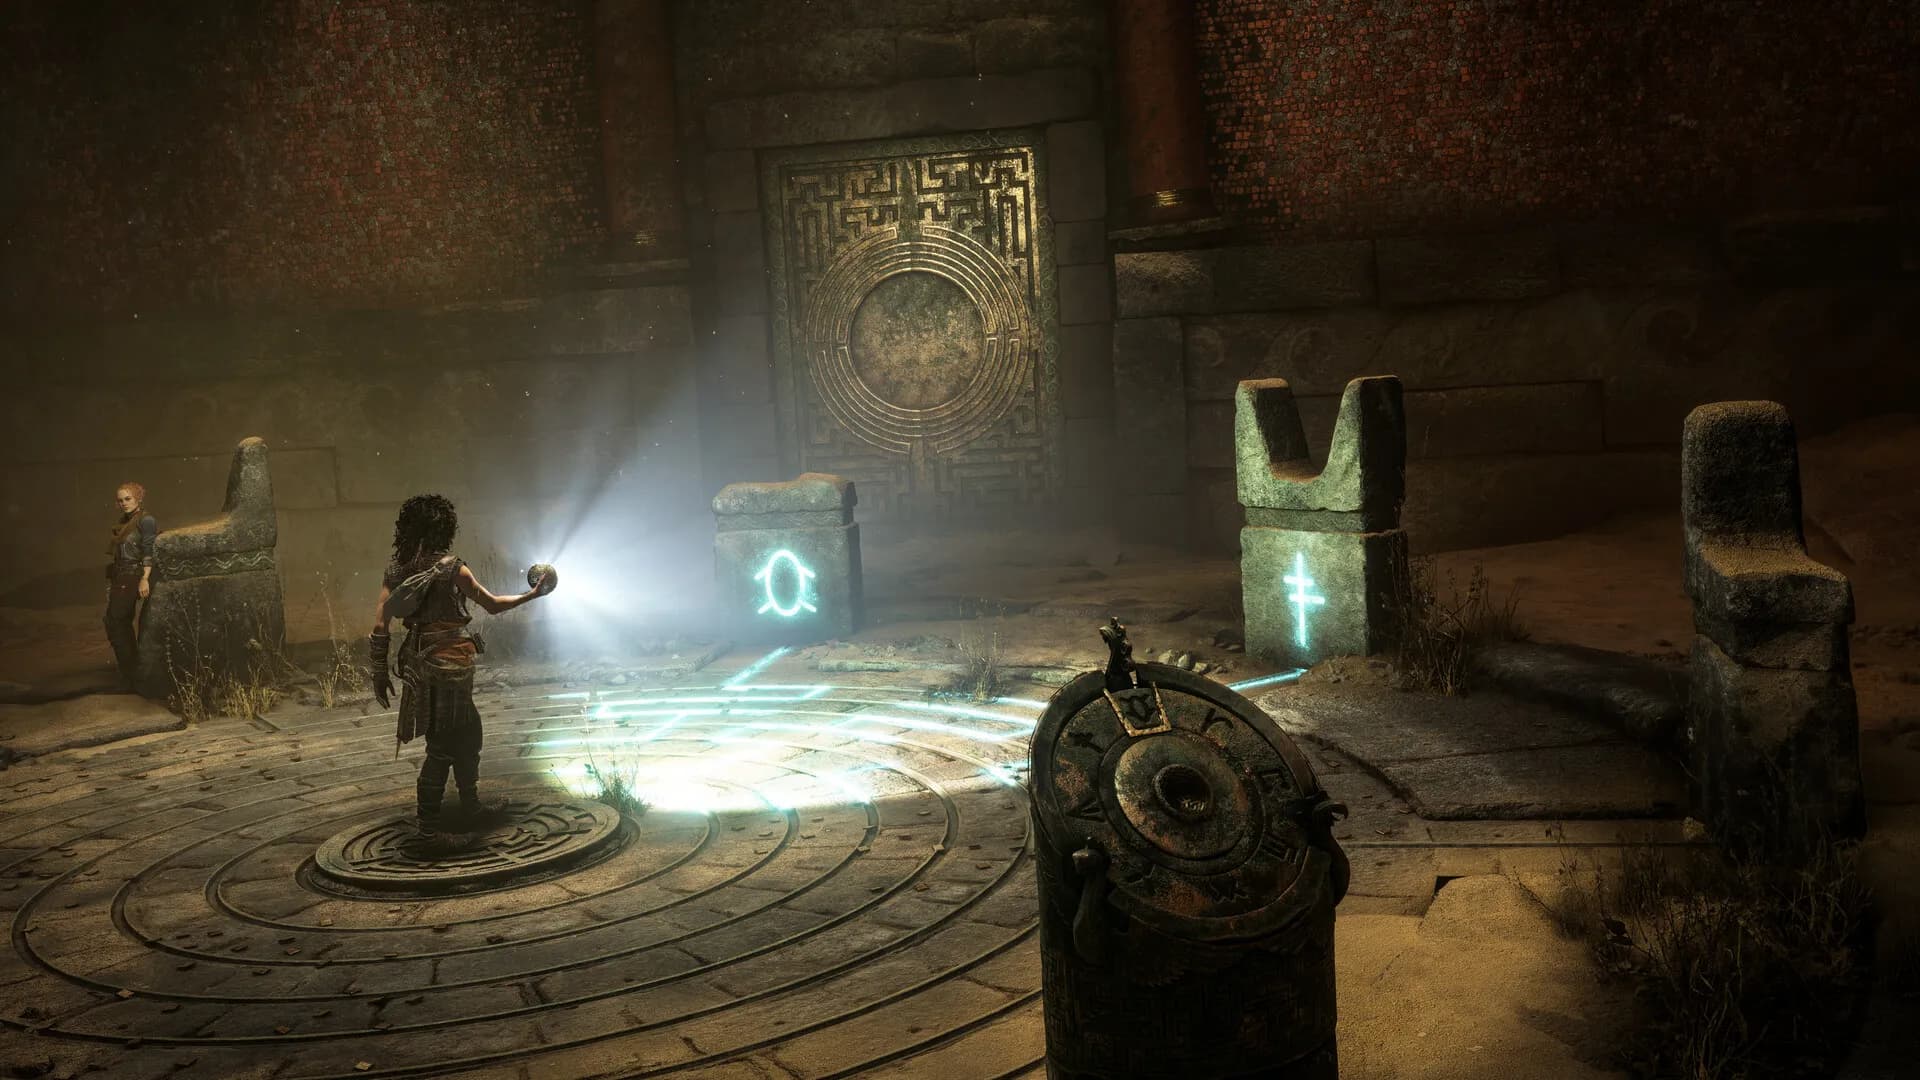
Stand where all three pedestals can be checked, shine the sphere and follow each blue floor line to the wall mark connected to that pedestal. The verified left-to-right answer is Y-like, C-like, then an arrowhead pointing upward.
Use the shapes rather than a presumed alphabet: the carved glyphs are stylized, while the blue connection line establishes which carving belongs to each pedestal.
Next reflector chain: left to right, then both front mirrors
In the room with the locked light door, reach the pressure plate above the entrance and stand on it to activate the source. Route the beam from the left reflector to the right reflector, then to the front-left reflector, front-right reflector and finally the door symbol.
Check the beam after every rotation. If it stops before the door, the last lit reflector identifies the single link that still needs correction.
Maze symbols and the two floor-spike routes
At the maze pedestals, reveal the lines again and set the left side to the O-like symbol and the right side to the vertical I-like carving. These are a separate two-symbol answer, not a continuation of the earlier Y-C-arrow combination.
For the first three-choice spike sequence, take left at all three decisions. In the second sequence, take right, then middle, then middle. Wait for moving spikes to complete their cycle before committing to the next tile.
Quick player questions
What is the Chapter 4 three-pedestal code?
From left to right: Y-like symbol, C-like symbol, upward arrowhead.
What are the Chapter 4 spike routes?
First route: left, left, left. Second route: right, middle, middle.